Peugeot 205 Manual
Bulbs (exterior lights) - renewalBody electrical system / Bulbs (exterior lights) - renewal
General
1 With all light bulbs, remember that if they
have just been in use, they may be very hot.
Switch off the power before renewing a bulb.
2 With quartz halogen bulbs (headlights and similar applications), use a tissue or clean cloth when handling the bulb; do not touch the bulb glass with the fingers. Even small quantities of grease from the fingers will cause blackening and premature failure. If a bulb is accidentally touched, clean it with methylated spirit and a clean rag.
3 Unless otherwise stated, fit the new bulb by reversing the removal operations.
Bulb renewal
Headlight
4 Where fitted, remove the cover from the
rear of the headlight.
5 Pull the connector from the bulb (see illustration).

8.5 Pull off the connector . . .
6 Remove the rubber cover, noting that the water drain hole is at the bottom (see illustration).

8.6 . . . remove the rubber cover . . .
7 Release the spring clips and withdraw the bulb (see illustrations).

8.7a . . . release the spring clips . . .

8.7b . . . and withdraw the headlight bulb
8 Fit the new bulb with the locating tab uppermost.
Front parking lights
9 Pull the bulbholder from the rear of the
headlight then depress and twist the bulb to
remove it (see illustration).

8.9 Removing the front parking light bulbholder
Front direction indicator 10 Turn the bulbholder anti-clockwise and withdraw it from the rear of the light (see illustration).

8.10 Remove the front direction indicator light bulbholder . . .
11 Depress and twist the bulb to remove it (see illustration).

8.11 . . . and extract the bulb
Front direction indicator side repeater 12 On early models, reach up behind the front wing, squeeze the plastic tabs together and push out the light. On later models, turn the light anti-clockwise and withdraw it from the front wing (see illustration).

8.12 Removing the front direction indicator side repeater on later models
13 Disconnect the wiring, remove the end cap, and extract the bulb: 14 When refitting the early type, position the light so that the location peg enters the hole in the front wing.
Front driving light (GTI models) 15 Remove the two lens surround retaining screws and withdraw the surround, lens and reflector (see illustration).

8.15 On GTI models, remove the driving light lens surround, lens and
reflector . . .
16 Release the spring clips and remove the bulb assembly (see illustration).

8.16 . . . then release the spring clips and remove the bulb assembly
17 Detach the bulb feed wire at the connector.
Rear light cluster bulbs 18 Remove the lens upper retaining screws then tilt the lens back and release it from the lower tabs (see illustrations).

8.18a Remove the rear light cluster screws . . .

8.18b . . . and release the lens from the tabs
19 Depress and twist the bulb to remove it (see illustration).

8.19 Removing a rear light cluster bulb
Rear foglight
20 Remove the screws and withdraw the lens
(see illustration).

8.20 Remove the rear foglight lens . . .
21 Depress and twist the bulb to remove it (see illustration).

8.21 . . . and extract the bulb
Number plate light
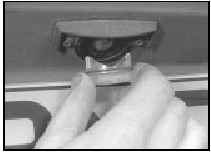
22 Twist off the lens (see illustration).

8.22 Remove the rear number plate light lens . . .
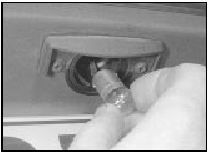
23 Depress and twist the bulb to remove it (see illustration).

8.23 . . . and extract the bulb
Reversing light (1991 models onward) 24 On later models, a single reversing light is mounted in the rear valance, instead of the twin lights in the rear light clusters fitted to previous models.
25 Bulb renewal is as described previously for the rear foglight bulb.


