


Peugeot 205 Manual
Switches - removal and refittingBody electrical system / Switches - removal and refitting
Steering column combination
switches
1 Disconnect the battery negative lead.
2 Remove the steering wheel and column shrouds, with reference to Chapter 10.
3 Disconnect the wiring harness plug.
4 Remove the relevant screws and withdraw the switch from the column platform (see illustration).
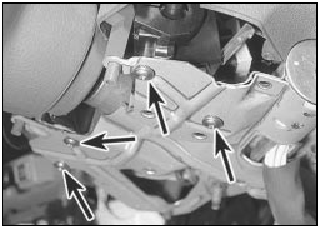
4.4 Combination switch screws (arrowed)
5 Refitting is a reversal of removal.
Facia switches (pre-1988
models)
6 Disconnect the battery negative lead.
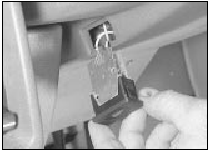
7 Carefully prise out the switch against the tension of the plastic retaining tabs (see illustration).
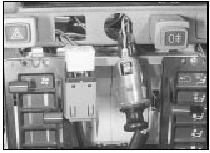
4.7 Heated rear window switch and cigar lighter removed from facia
8 Disconnect the wiring or multi-plug, noting the fitted location, and remove the switch.
9 Refitting is a reversal of removal.
Facia switches (1988 models
onward)
10 Disconnect the battery negative lead.
11 Open the ashtray.
12 Unclip the bottom of the clock surround (where fitted) and remove it.
13 Remove the screws from the bottom of the switch panel, then insert lengths of welding rod (or similar) into the special holes, and remove the switch panel surround (see illustrations).
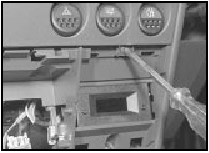
4.13a On later models, remove the switch panel lower screws . . .
4.13b Insert lengths of rod into the special holes . . .
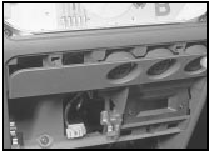
4.13c . . . and withdraw the switch panel surround
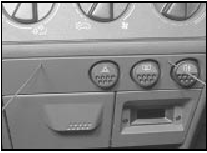
14 The individual switches may now be removed by inserting two small screwdrivers in the slots on each side of the switch, extracting the switch, and disconnecting the wiring.
15 Refitting is a reversal of removal.
Instrument panel rheostat -
removal and refitting
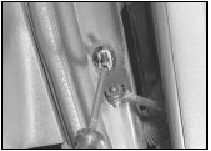
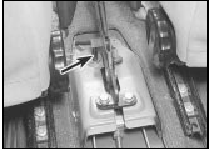
16 Prise the rheostat from the steering
column lower shroud, and disconnect the
wiring (see illustration).
4.16 Instrument illumination rheostat
17 Refitting is a reversal of removal.
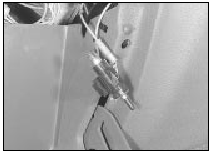
Reversing light switch - removal
and refitting
18 Disconnect the wiring and unscrew the
switch from the top or side of the transmission
housing (see illustration). Remove the
washer.
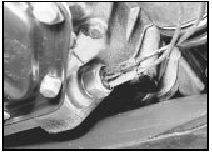
4.18 Reversing light switch location on the BH3 transmission
19 Refitting is a reversal of removal, but
renew the washer if necessary
Courtesy light switch
20 Disconnect the battery negative lead.
21 The switch is secured to the door pillar by a self-tapping screw. Extract the screw and withdraw the switch and leads (see illustration).
4.21 Removing a courtesy light switch
22 If the leads are disconnected, tape them to the pillar to prevent them from slipping inside the pillar cavity.
23 It is recommended that the metal contacts of the switch are smeared with petroleum jelly as a precaution against corrosion.
24 Refit by reversing the removal operation.
Glovebox illumination switch 25 Disconnect the battery negative lead.
26 Open the glovebox then reach up and release the switch from the inside of the facia (see illustration).
4.26 Glovebox illumination switch
27 Disconnect the wiring.
28 Refitting is a reversal of removal.
Ignition switch/steering column
lock
29 Refer to Chapter 10.
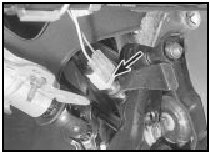
Handbrake warning switch 30 Move the front seats fully forward then remove the screw and lift the cover from the handbrake lever.
31 With the handbrake applied, remove the mounting screw, withdraw the switch and disconnect the wiring (see illustration).
4.31 Handbrake warning light switch (arrowed)
32 Refitting is a reversal of removal.
Brake stop light switch
33 Disconnect the battery negative lead.
34 Remove the lower facia panel from the steering column.
35 Disconnect the two wires (see illustration).
4.35 Brake stop light switch wiring connector (arrowed)
36 Unscrew the locknut nearest the pedal, and withdraw the switch from the bracket.
37 Refitting is a reversal of removal, but adjust the locknuts so that the distance between the end of the switch threaded body and the pedal (fully released) is 3.5 mm.


