


Peugeot 205 Manual
Facia panel - removal and refittingBodywork and fittings / Facia panel - removal and refitting
Removal
Pre-1988 models
1 Disconnect the battery negative lead then
remove the steering wheel (Chapter 10) and
instrument panel (Chapter 12).
2 Remove the screws and withdraw the steering column lower shroud.
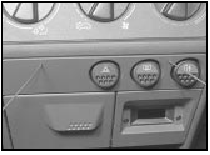
3 Remove the ashtray.
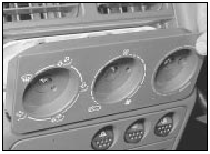
4 Prise out the central air vents (see illustration).
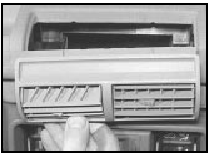
26.4 Removing the central air vents
5 Prise out the digital clock which is retained by plastic barbs (see illustration).
26.5 Digital clock and retaining barbs (arrowed)
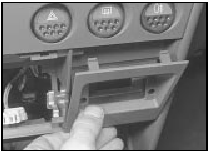
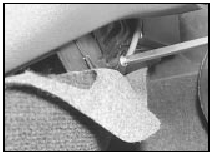
6 Using a hooked instrument, withdraw the rear of the oddments recess (see illustration).
26.6 Removing the rear of the oddments tray
7 Remove the radio, as described in Chapter 12, or prise out the blank (as required).
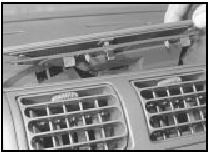
8 Remove the gear lever surround and centre console, noting that the console is held at the top by plastic clips (see illustration).
26.8 Centre console upper clip (arrowed)
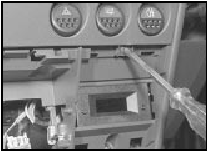
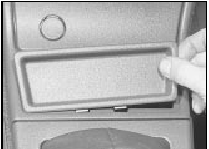
9 Remove the screw from inside the ashtray recess (see illustration).
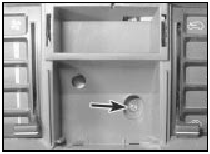
26.9 Facia mounting screw located in the ashtray recess (arrowed)
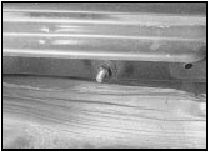
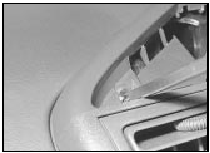
10 Unscrew the facia bottom mounting bolts including the one on the bonnet release handle (see illustration).
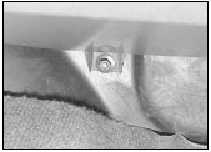
26.10 A facia bottom mounting bolt
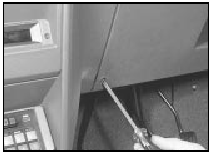
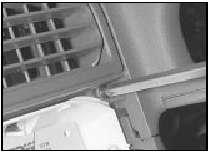
11 With the glovebox open, remove the mounting screw located near the glovebox lamp (see illustration).
26.11 Removing a facia mounting screw
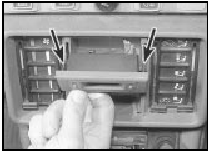
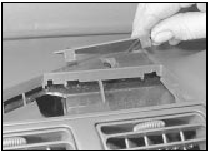
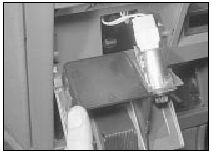
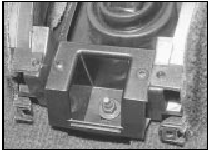
12 Remove the central lower panels (see illustration).
26.12 Facia central lower panels and bracket
13 With the bonnet open, remove the plastic grille and unscrew the front facia mounting nuts (see illustration).
26.13 Facia front mounting nut
14 Withdraw the facia panel at the same time disconnecting the relevant switches and cigar lighter. Reconnect the switch wiring immediately to ensure correct refitting.
1988 models onward
15 Disconnect the battery negative lead.
16 Remove the screws and withdraw the right-hand lower facia panel (see illustration).
26.16 Removing a right-hand lower facia panel securing screw
17 Prise out the instrument panel rheostat, and disconnect the wires.
18 Remove the screws and withdraw the lower steering column shroud.
19 Prise out the coin box and the triangular cover (see illustrations).
26.19a Prise out the coin box . . .
26.19b . . . and triangular cover
20 Pull off the heater control knobs.
21 Remove the screws in the outer control knob apertures and withdraw the heater control surround (see illustration).
26.21 . . . Withdraw the heater control surround
22 Remove the screws and withdraw the central vent assembly (see illustrations).
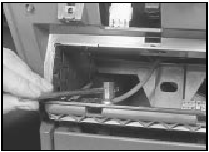
26.22a Removing the central vent assembly upper . . .
26.22b . . . and lower screws
23 Remove the radio (Chapter 12) or oddments compartment, as applicable.
24 Remove the screws and withdraw the trim quadrants from each side of the facia.
25 Remove the ashtray and disconnect the wiring from the cigar lighter (see illustration).
26.25 Removing the ashtray
Identify the wiring.
26 Unclip the clock surround (see illustration).
26.26 Removing the clock surround
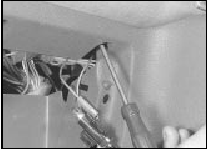
27 Insert lengths of welding rod, or similar, into the holes at the top of the switch surround to release the upper clips, then undo the lower screws and remove the surround (see illustrations).
26.27a Method of releasing the switch surround upper clips
26.27b Remove the lower screws and withdraw the surround
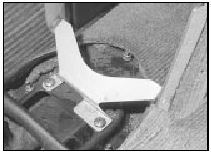
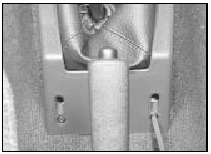
28 Prise the steering column grommet from the floorpan.
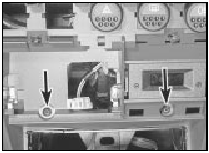
29 Unscrew the mounting nuts and lower the steering column to the floor (see illustration).
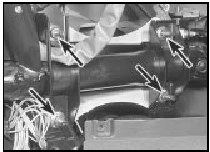
26.29 Steering column mounting nuts (arrowed)
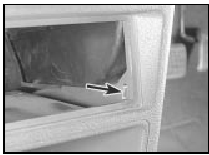
30 Prise the small vents from each side of the centre console.
31 Pull back the carpet and remove the screws (see illustration).
26.31 Prise out the console vent and remove the screw
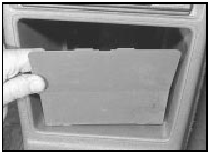
32 Prise the small tray from the centre console (see illustration).
26.32 Removing the centre console tray
33 Remove the screws, and slide the surround up the gear lever (see illustration).
26.33 Remove the screws and slide the surround up the gear lever
34 Remove the upper and lower nuts, and withdraw the centre console (see illustrations).
26.34a Removing the centre console upper nuts . . .
26.34b . . . and lower nut
35 Unclip the felt cover from under the facia.
36 Remove the screws and withdraw the front facia panel. Disconnect the wiring from the switches (see illustration).
26.36 Front facia panel screws (arrowed)
37 Remove the heater control panel retaining screws.
38 If necessary, remove the side vents.
39 Remove the instrument panel (Chapter 12) and choke cable, where applicable (Chapter 4A).
40 Remove the left lower facia mounting screw.
41 Unclip the glovebox and remove the lighting switch. Also remove the light.
42 Remove the remaining mounting screws and nuts, and withdraw the facia sufficiently to disconnect the wiring. Access to the front mounting nuts is gained by removing the wiper arms and the plastic guard from the plenum chamber in the engine compartment.
Identify each wire for location.
43 Unclip the fuse and relay panel, and withdraw the facia panel from the car.
Refitting
All models
44 Refitting is a reversal of removal, but on
completion check the operation of all
electrical components.


