
Peugeot 205 Manual
Mono-Jetronic A2.2 system components - removal and refittingFuel system - carburettor engines / Mono-Jetronic A2.2 system components - removal and refitting
Note: Check the availability of individual components with your Peugeot dealer before dismantling.
Fuel pressure regulator
Note: Refer to the warning note in Section 1
before proceeding.
1 The fuel pressure regulator (consisting of a valve operated by a spring-loaded diaphragm and a metal cover) is secured by four screws to the top of the throttle body (see illustration).
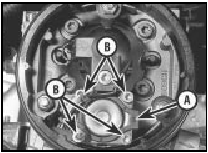
11.1 Fuel injector wiring clip (A), and fuel pressure regulator securing
screws (B) - Mono-Jetronic A2.2 system
Although the unit can be dismantled for cleaning, if required (once the air inlet trunking and the fuel injector wiring clip have been removed for access), it should not be disturbed unless absolutely necessary.
2 Note that the regulator assembly is only available as part of the complete throttle body assembly; no individual components can be renewed separately.
3 If the regulator cover is removed, note its orientation on the throttle body before removal, to ensure correct refitting.
Fuel injector
Note: Refer to the warning note in Section 1
before proceeding. If a faulty injector is
suspected, before condemning the injector, it
is worth trying the effect of one of the
proprietary injector-cleaning treatments.
4 Disconnect the battery negative lead.
5 Remove the air inlet trunking from the top of the throttle body.
6 Remove the Torx screws securing the injector wiring connector to the top of the throttle body, then carefully lift off the connector (see illustrations).
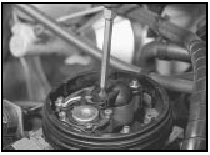
11.6a Remove the Torx screw . . .
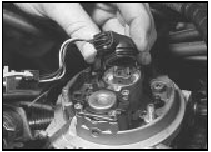
11.6b . . . and lift off the wiring connector
7 Withdraw the injector (see illustration).
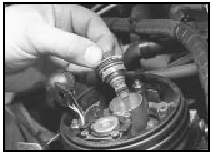
11.7 Withdrawing the fuel injector
Recover and discard the injector sealing rings.
8 Refitting is the reverse of the removal procedure, noting the following points.
a) Always renew both sealing rings: apply a smear of grease to each ring, to ease injector refitting.
b) Ensure that the injector is refitted so that its connector pins align with the connector when the connector is correctly located on the top of the throttle body.
c) Before refitting the injector securing screw, apply a few drops of a suitable thread-locking compound to the threads.
d) On completion, switch on the ignition and check carefully for signs of fuel leaks; if any signs of leakage are detected the problem must be rectified before the engine is started.
Inlet air temperature sensor 9 The sensor is located in the fuel injector wiring connector, and is available only as part of the connector assembly. To remove the connector assembly, proceed as follows.
10 Disconnect the battery negative lead.
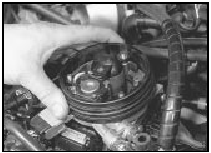
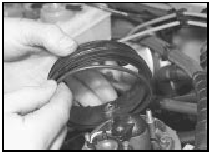
11 Remove the air trunking from the top of the throttle body, then unscrew the three securing nuts, and remove the sealing ring.
Recover the O-ring (see illustrations).
11.11a Remove the sealing ring . . .
11.11b . . . and recover the O-ring
12 Release the securing clips, separate the two halves of the fuel injector wiring connector, then release the wiring from the clip on the top of the throttle body (see illustrations).
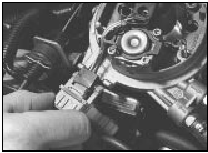
11.12a Separate the two halves of fuel injector wiring connector . . .
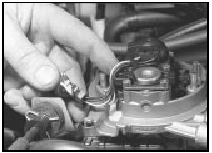
11.12b . . . then release wiring from clip
13 Remove the Torx screw securing the fuel injector wiring connector to the top of the throttle body, then carefully lift off the connector (see illustration).
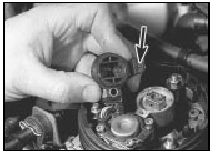
11.13 Intake air temperature sensor (arrowed)
Idle speed control motor 14 Disconnect the battery negative lead.
15 Release the securing clip, and disconnect the wiring plug from the motor (see illustration).
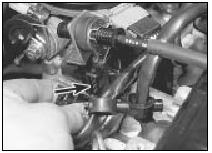
11.15 Disconnecting wiring plug from idle speed control motor (arrowed)
16 Unscrew the securing screws, and withdraw the motor from the throttle body assembly (see illustration).
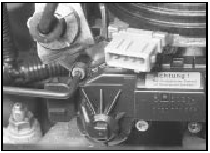
11.16 Unscrewing an idle speed control motor securing screw
17 Refitting is the reverse of the removal procedure. Note that the motor will reset itself as soon as the engine is restarted.
Throttle switch
18 The throttle switch is accurately matched
on the throttle valve during manufacture - it is
not adjustable and must not be disturbed.
19 Do not attempt to adjust the throttle switch setting or that of the stop screw on the throttle valve external linkage; if the accurately matched relationship between these components is lost, the components must be replaced. At the time of writing this means renewing the entire throttle body assembly.
Throttle body
Note: Refer to the warning note in Section 1
before proceeding.
20 Disconnect the battery negative lead.
21 Remove the air inlet trunking from the top of the throttle body.
22 Disconnect the throttle cable (see Section 3).
23 Release the securing clips, and disconnect the wiring plugs from the fuel injector, the idle speed control motor, and the throttle switch (see illustrations).
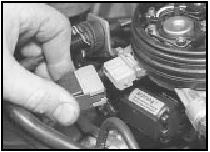
11.23a Disconnecting the wiring plug from the fuel injector . . .
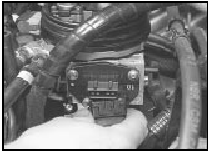
11.23b . . . and the throttle switch
24 Disconnect the fuel hoses from the unions on the throttle body (refer to Section 4). Plug the open ends of the hoses, to prevent dirt ingress and further fuel loss. Take note of the connections, and label them to ensure correct refitting.
25 Disconnect the vacuum hoses and pipes from the throttle body unions (see illustration).
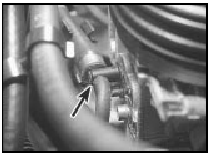
11.25 Vacuum hose connection to throttle body (arrowed)
Label the hoses and pipes so that they can be correctly reconnected on refitting.
26 Remove the screws securing the throttle body to the inlet manifold, then withdraw the assembly (see illustration). Recover the gasket, and discard it.
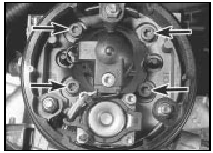
11.26 Throttle body securing screws (arrowed)
27 If desired, the throttle body upper and lower sections may be separated by removing the securing screws. Note that a new gasket must be fitted on reassembly. As noted previously, do not disturb the throttle switch.
The fuel inlet and return unions may be unscrewed from the throttle body, and the vacuum hose unions may be detached, but note that new sealing rings must be fitted on reassembly.
28 Refitting is the reverse of the removal procedure, noting the following points.
a) Renew all gaskets and seals, and use suitable thread-locking compound where applicable.
b) Check the throttle cable operation and adjustment (Section 3).
c) Ensure that all vacuum hoses and pipes are correctly reconnected, as noted before removal.
d) Ensure that the fuel hoses are correctly reconnected. The direction of fuel flow is indicated by arrows cast into the throttle body next to each union.
e) On completion, switch on the ignition, and check for signs of fuel leaks from all disturbed unions. If any signs of leakage are detected, the problem must be rectified before the engine is started.
Coolant temperature sensor Refer to Chapter 3, Section 7.
Electronic control unit (ECU) 29 The ECU is located behind the facia, to the right of the steering column.
30 Disconnect the battery negative lead.
31 For improved access, remove the driver’s side lower facia panel. The panel is secured by four screws, and a single bolt.
32 Remove the nuts securing the ECU bracket to the facia, then lower the assembly.
Withdraw the ECU from the bracket (see illustration).
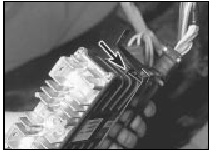
11.32 Removing the ECU from its bracket. Note securing lug (arrowed)
33 Release the securing clip, or remove the securing screws, as applicable, and disconnect the wiring plug (see illustration).
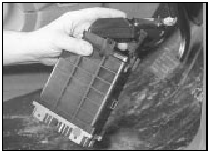
11.33 Disconnecting the ECU wiring plug
34 Refitting is a reversal of removal, but ensure that the wiring plug is securely reconnected, and where applicable, ensure that the ECU locates correctly in the bracket.
Fuel injection system fuses and
relays
35 The relays are generally mounted on the
left-hand side of the engine compartment
bulkhead. The relays may be mounted on
individual brackets, or on later models, in a
plastic box.
36 Most of the fuses are located in the main fusebox inside the car, although on certain models, additional fuses may be located in a small fusebox mounted at the front left-hand corner of the engine compartment.
37 The number and type of fuses and relays fitted will depend on engine type and exact vehicle specification.


